DIY – Button Earrings

26 May

Since I work at a craft store, I’m ALWAYS trying to come up with ideas and make this mental to-do list for jewelry. Since I’ve experimented with necklaces and rings, I figured I’d give earrings a shot. With that said, some wild skulls appeared; skull buttons to be exact. The back was just big enough to glue on a large earring post and voila! Cute skull button earrings! I used the almighty E-6000 glue to insure that these babies weren’t falling off for anything.

-What You’ll Need-
-2 buttons (flat backed)
-strong glue (I prefer E-6000)
-earring postings (small/large)

1- Find your buttons that you’d like to transform into custom earrings.
*Note: It’s best to try to find a flat backed button. My skull buttons had a low loop on it for sewing, but I was able to position the post right above it and can wear them comfortably.
2- Glue the appropriate sized posting on back.
3- Just wait for the glue to dry!
It’s that easy…

I even made a second, more conservative pair!
 All my supplies came for Jo-Ann Fabric and Crafts. The buttons were about $6 a piece, the glue was $5, and the postings were $2.

Happy crafting!
-Mush

The Fish Tail Braid

22 May

I’m not the best hair dresser, so I was STOKED to finally be able to master “The Fish Tail Braid”. It’s actually not as hard as I thought it’d be. With the help of YouTube and The Beauty Department, I learned how to master a new braid in about 3 minutes!

Glitter, Glitter, Glitter

15 May

Glitter is a girl’s best friend…especially if you can’t afford diamonds! And with that, Mod Podge makes it super easy to put glitter on nearly anything.  I took the liberty to try out Mod Podge’s awesomeness on an old, dull vase of mine. This idea is really inexpensive and even cheaper if you already have the vase and/or other surfaces that need to see the gleam of glitter…
Things You’ll Need:
Mod Podge Matte Finish
Paint Brush
Vase, Picture Frame, etc.

1- Make sure the surface you’re about to glitterfly, is clean and free of any oils or dirt.
2- Mod Podge goes a LONG way, so you’ll only need just a little. I used about 3 ounces and still had plenty to use. Pour your Mod Podge in/on to something that you don’t care about ruining
*(MP dries quickly and it’s just best to avoid containers you’ll want to use in the future).
3- Pour your glitter onto the MP. I typically cannot use enough glitter, so plentiful amounts is fine.
4- Use the brush to paint the surface of your vase.
5- Cover either the whole surface or play around with different designs!
6- Let it dry. I left mine outside and it was dry in about an hour.

*Note: Mod Podge goes on foggy but it does dry clear. I was worried that my vase would have a frosted effect in between the glitter, but luckily it didn’t! So, no worries there!

DIY Felt Cell Phone Cases

14 May

I’m not even qualified to be considered a “bad sewer” and I managed to pull thesecustom cell phone cases off. Super easy, super cheap, and super cute. I’m sorry I don’t have a video tutorial, but that will soon change. Until then, I found hundreds of super cute tutorials on YouTube that were really helpful and easy to follow. 

*The video is of a Domo case, but the workings are all the same. Just make yourself a template and piece it together! 🙂

New Orleans Trip In Pictures

11 May

Forever 21 Unboxing

10 May

I love, love, love Forever 21. I’m what you call, an addict. I especially love when I order something online, forget about it, and then be completely surprised when I come home and there’s a package waiting for me.

I bought the following:
– Expandable Polka Dot Cosmetic Bag in Pink/Black – $6.80

– Gold/Pink Coin Purse – This item isn’t in stock anymore, but I believe I paid around $2 for it.

– F1271 Aviators in Brown/Gold – $5.80

– Leopard Print Sunglasses Protector in Pink/Black – This item isn’t in stock either, but I paid around $1 for it.

– Mustache Ear Buds – This isn’t in stock anymore , which sucks because they are SUPER cute. But I paid right at $5 for them.

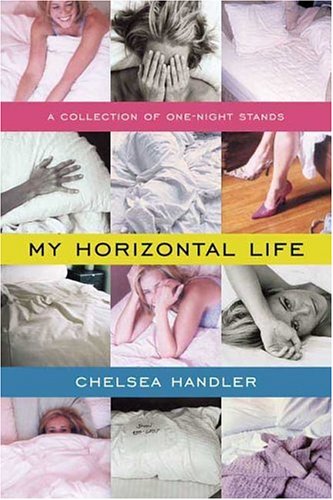
Review: “My Horizontal Life: A Collection of One Night Stands” by Chelsea Handler

9 May

So I just finish reading my third book by the genius Chelsea Handler. It was -HILARIOUS-. I could probably reread this book over and over again. I usually buy a lot of my books at Books-A-Million or of course order them online on Amazon.com. I can’t remember exactly where I got this one from, but I don’t care – I loved it. I actually finished the book itself in about 3 days. From Amazon, the book is right at $8. It’s 213 pages long and I honestly wished it was longer. She is so hilarious and NOTHING goes untouched. It’s a classic Chelsea Handler memoir. I guessing that if you’re nothing less than in love with Chelsea, that you should be ordering this book like right now! 

A Few Nail Tutorials …

8 May

I’m no where near the best when it comes to fingernails. I actually kind of suck at the whole “nail-painting” gig. But hopefully, I’ll be able to pull these off either sooner or later! Enjoy!

Review: Perfect Fit Button

7 May

Okay, so if you’ve ever stayed up past 3am and watched TV, then chances are you’ve seen “The Perfect Fit Button”. The Perfect Fit Button is nothing more than, well an extra button. I first saw this when I was pregnant. Which was a little better than the rubber-band trick when it comes to busting out of your jeans. For the most part I didn’t look like a hot mess testing an innocent rubber band’s elasticity from my ever growing baby bump. I even saved money saving my “buttons” to take in some of my bigger clothes. Even though I still have all of my buttons, I can’t give this product 10 out of 10 …


To be honest, I’d just been happy if all of the buttons were just the standard “jean” design. If your really trying to hide the fact that you can’t fit in your jeans anymore, no one is going to see that you chose a lovely shade of brown to hold your pants together.

Another thing is, it was SUPER hard for me to unlatched this ultimate button. I had to literally recruit a pair of pliers to help me undo this bad boys. Not fun …

And last but not least, they left a nasty little “circle mark” on my lower stomach. The back part of the button (which is really like a giant earring), is not flat nor is it comfortable.

It’s a pretty decent product, but I wouldn’t go out of my way to recommend it. I use it – Yes. Do I love it? Ehh …

Available now at Wal-Mart stores for around $10 and available on Amazon.com for around $6

Review: Skittles Hair Extension

6 May

Back in December 2010, I had a HORRIFIC hair dye job. After many re-dyes and hair strips, I finally mustered up the nerve to go to a salon to get it fixed. Of course being that black hair dye is such a joy to work with, she couldn’t do much. But, she did give me a cute cut and some really nice highlighting effects with my (still black) hair.

She also threw in 2 Skittle Micro Ring Extensions. I chose red. I just think that red and black go together like peanut butter and jelly. So anyways, I got my two little extensions in and I was in Heaven.

I loved them soooo much. They were easy to remove, replace, wash, style, etc. I’m not sure what brand my hairdresser used, but you can buy a similar style on Amazon.com.

They do tend to be a bit more expensive than my salon ($25 for two …). But I was in love with them. I kept them in from December 2010 to May 2011.

They’ve surpassed through many flat ironing, washes, curling irons, sun, blow drying, pony tails, etc. They are 100% human hair, so they can even be dyed!

Micro Ring Extensions have to be applied using the right tools. You can also find the proper tools on Amazon.com. I found a similar look for about $30 :/ … http://www.amazon.com/Straight-Human-Hair-Extensions-Burgundy/dp/B003YTSZD8/ref=sr_1_32?ie=UTF8&qid=1306834036&sr=8-32 .

They were a really great way to spice up your boring style! I’d definitely invest in some more!